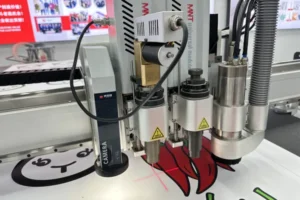
A digital engraving and cutting machine mixes a spindle, an oscillating knife, a CCD camera and a vacuum table on the same gantry. Each of those subsystems fails differently, and none of them fails the same way twice.
Shops running machines like the MNT T7 ATC digital engraving and cutting machine usually only think about preventive maintenance after a cut starts drifting off the printed line or a spindle bearing starts humming. By then the fix costs a shift, not fifteen minutes. A router that skips registration, blade or dust maintenance loses accuracy in weeks, not years — and the first sign is almost always scrapped material, not a machine alarm.
This checklist breaks the T7’s maintenance into daily, weekly and monthly tasks so an operator can run through it in the time it takes the spindle to warm up. Nine subsystems, what to check, and how often.
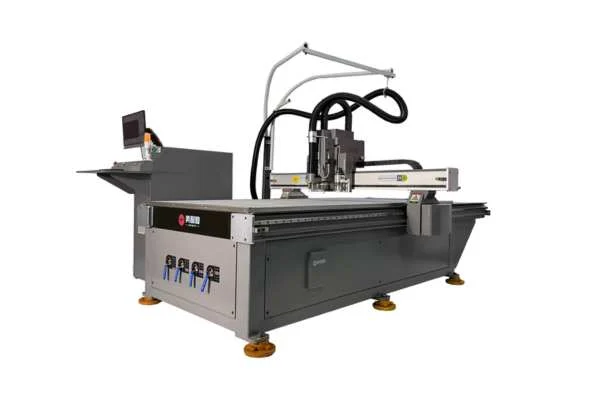
Warm Up the Spindle Before Every Shift
Run the spindle at low RPM for two to three minutes before the first cut of the day, especially after the machine has sat overnight in a cold shop. A cold spindle bearing has thicker grease and a tighter running clearance than a warmed-up one, and cutting straight into full RPM is the single fastest way to shorten bearing life.
Most controllers on ATC digital engraving machines let you set a warm-up cycle as a saved program — ramping from around 3,000 RPM up to the working speed over two to three minutes rather than relying on the operator to remember. Listen for the sound to even out before loading material. A spindle that whines or changes pitch under no load needs a bearing inspection, not a warm-up.
Log the warm-up as part of shift start-up, not as an optional step. Shops that skip it in the name of throughput end up losing more time to unscheduled spindle swaps than they ever saved.
Check the Oscillating Knife Blade Before You Cut
Inspect the blade edge under good light before the first job of the day, and again any time the cut edge starts looking torn instead of clean. A dull or chipped blade doesn’t announce itself with an alarm — it shows up as frayed edges on fabric, melted-looking edges on foam, or a cut that doesn’t fully separate the material on the first pass.
Check three things: the edge for nicks or rounding, the blade depth setting against the material thickness, and the blade holder for play. A blade that’s still sharp but mounted with even a small amount of lateral play will wander in thicker stock and leave an angled rather than vertical wall. Most oscillating knife heads take seconds to swap a blade — there’s no reason to keep cutting with one that’s marginal.
Keep a running log of blade life by material. Abrasive board, fiberglass-backed material and multi-layer leather dull a blade far faster than single-layer fabric or foam, and knowing the pattern lets you swap blades on a schedule instead of waiting for bad parts to tell you.
Clean the CCD Camera Lens Daily
Wipe the camera lens with a lint-free cloth at the start of every shift — dust, adhesive mist and cutting debris settle on the lens constantly, and a dirty lens is the most common cause of registration failures that look like a calibration problem but aren’t.
The CCD camera on a digital engraving and cutting machine reads printed registration marks to align the cut path to a printed sheet. A lens with even a light film of dust reduces contrast enough that the camera starts missing marks intermittently — which shows up as occasional misregistration rather than a consistent offset, making it easy to blame on the wrong thing. Use compressed air first to blow off loose debris, then a lens-safe cloth; never a dry paper towel, which can scratch the coating.
Check the camera’s working height and lighting ring at the same time. If the ring light has dimmed or debris has built up around it, mark reading gets less reliable even with a clean lens.
Recalibrate Registration When Cuts Drift Off Print
Run the camera calibration routine any time cuts start landing off the printed artwork by more than the machine’s rated accuracy, and as a fixed check every week even if nothing looks wrong. Registration drift is gradual — it rarely jumps from perfect to obviously wrong, so a weekly check catches it before a full batch gets scrapped.
Calibration on most digital cutting machines involves printing a test grid, letting the camera read it, and confirming the reported offset is within tolerance — typically well under a millimeter on a well-maintained machine. If the offset keeps growing between calibrations, the cause is usually mechanical (belt tension, a loose camera mount) rather than something the calibration routine itself can fix permanently.
Keep the calibration sheet itself flat and undamaged — a curled or creased test print reads inconsistently and can make a properly calibrated machine look like it’s drifting.
Inspect the Vacuum Table and Gaskets
Check the vacuum table’s zone gaskets and surface for wear weekly, and listen for a drop in suction at the start of every shift. A vacuum table that’s losing hold isn’t just a productivity problem — thin material that lifts mid-cut produces torn edges and can foul the knife or router bit entirely.
Clean cutting dust and material offcuts out of the table’s vacuum channels regularly; blocked channels reduce hold in that zone even with a fully functional pump. Check gaskets around unused zones for cracking or compression set — a worn gasket lets air bypass into the working zone and drops overall suction there too.
If suction has dropped across the whole table rather than one zone, check the pump filter before assuming the pump itself has failed. A clogged filter is a five-minute fix; a worn vacuum pump is not.
Care for ATC Tool Holders and Collets
Wipe down tool holder tapers and collets daily, and inspect them for wear weekly. The automatic tool changer relies on a clean, undamaged taper to seat each tool accurately — a small burr or a film of resin buildup is enough to throw off tool length offset by a measurable amount.
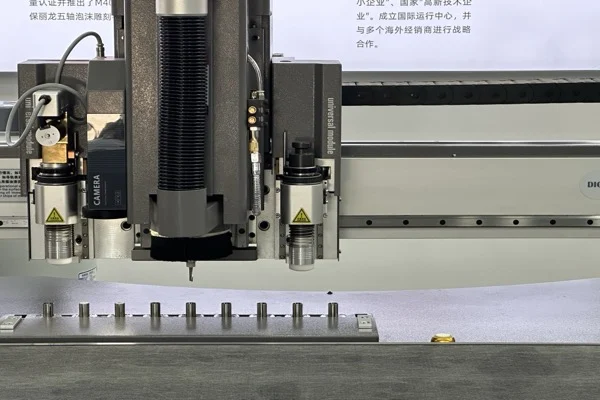
Check collet ID for wear each time you swap tooling, especially on collets used with smaller-diameter bits that run at higher RPM. A worn collet lets a bit run slightly off-center, which shows up as an oversized or rough-walled hole long before it shows up as an obvious failure.
Keep the tool magazine itself free of dust and debris — a slot with debris in it can prevent a tool from seating fully during an automatic change, which either throws a fault or, worse, lets the machine proceed with a tool that isn’t fully secured.
Manage Dust and Chip Extraction
Check dust extraction airflow daily and clean or replace filters on the schedule the extractor manufacturer specifies — usually weekly to monthly depending on material mix and duty cycle. Extraction that’s losing suction doesn’t just make a mess; it lets dust settle back onto the vacuum table and the CCD camera, feeding both of the problems above.
Wood and MDF dust in particular builds up fast in ductwork and can create a combustible dust hazard if extraction isn’t maintained — this is a safety item, not just a housekeeping one. Check ducting for leaks at joints, which quietly reduce extraction efficiency at the cutting head even when the extractor itself is running fine.
Separate extraction routines by material where possible. A shop running wood, foam and fabric on the same T7 needs to check filters more often than a shop running a single clean material, simply because the debris mix clogs filters faster.
Back Up Controller Files and Machine Parameters
Back up the controller’s job files, tool library and machine parameters weekly, and after any parameter change. A controller crash or an accidental parameter reset is rare, but when it happens on a machine with months of dialed-in tool offsets and material presets, rebuilding from memory costs far more time than a scheduled backup would have.
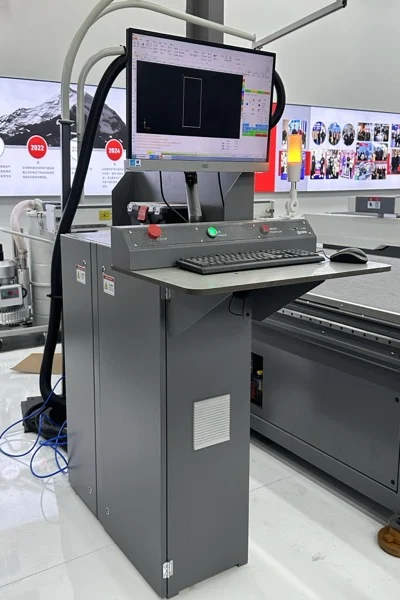
Most industrial PC controllers support exporting job files and machine configuration to a USB drive or network location in a few minutes. Keep at least two backup generations, not just the most recent one — a backup taken right after a bad parameter change is a backup of the mistake, not a safety net.
Document any manual offset or wear compensation the operator dials in day to day. Those small adjustments rarely get written down anywhere except the controller itself, and they’re exactly what’s lost first in an unplanned reset.
Review Machine Guarding
Inspect guards, interlocks and emergency stops monthly, and immediately after any guard has been removed for service. A guard that’s been taken off to clear a jam and not fully reinstalled is one of the most common ways an interlock ends up defeated without anyone deciding to defeat it.
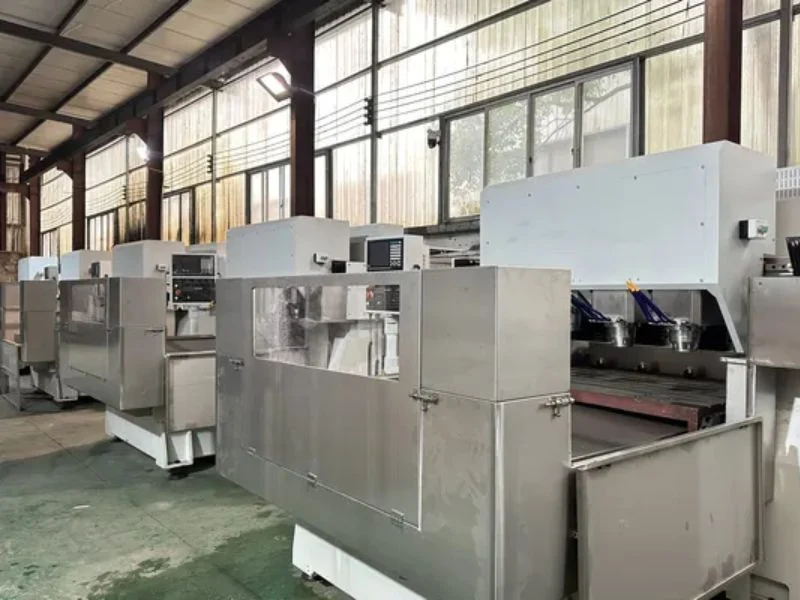
Check that polycarbonate or mesh guards are still fully seated and undamaged, that interlock switches trigger reliably when a guard is opened, and that the emergency stop actually cuts power rather than just pausing the program. These checks take a few minutes and belong on the same schedule as any other safety-critical system — see OSHA’s machine guarding requirements for the general standard most shops are already working against.
Train every operator, not just the maintenance lead, to recognize a guard that isn’t seated correctly. The person who notices it first is usually whoever is standing in front of the machine that day.
Maintenance Schedule at a Glance
Use this as a wall-chart version of the checklist above — the detail on why each item matters is in the sections it links back to.
| Task | Daily | Weekly | Monthly |
|---|---|---|---|
| Spindle warm-up cycle | ✔ | ||
| Oscillating knife blade check | ✔ | ||
| CCD camera lens cleaning | ✔ | ||
| Registration calibration | ✔ | ||
| Vacuum table suction check | ✔ | ||
| Vacuum gasket & channel inspection | ✔ | ||
| ATC tool holder / collet wipe-down | ✔ | ||
| ATC tool holder wear inspection | ✔ | ||
| Dust extraction airflow check | ✔ | ||
| Filter cleaning / replacement | ✔ | ||
| Controller / parameter backup | ✔ | ||
| Guarding & interlock review | ✔ |
Most of this checklist applies to any digital engraving and cutting machine built around a shared spindle, oscillating knife, camera and ATC layout — see our digital cutting machine overview for how the T7 compares to router-only and knife-only formats, or the oscillating knife cutting machine page if blade wear is your main cost driver.
Frequently Asked Questions
How often should the oscillating knife blade be replaced?
There’s no fixed hour count — replace it when the cut edge stops separating cleanly or shows fraying, which on abrasive materials like fiberglass-backed board can happen within a single shift and on fabric or foam can take weeks. Track blade life by material rather than by calendar time.
What causes registration drift on a digital cutting machine?
Most drift traces back to a dirty CCD camera lens, loosened camera mounting, or belt tension changes rather than a fault in the calibration routine itself. Weekly calibration checks catch drift before it causes scrapped material; if the offset keeps growing right after calibration, check the mechanical mounting first.
Do I need to warm up the spindle even for short jobs?
Yes — bearing wear from a cold start happens regardless of how long the subsequent job runs. A two to three minute low-RPM warm-up cycle costs far less time than an unscheduled spindle replacement.
Why is my vacuum table losing hold in only one zone?
A single weak zone usually means a worn or cracked gasket around an adjacent unused zone letting air bypass, or debris blocked in that zone’s vacuum channel — not a failing pump. Check gaskets and channels before assuming the pump needs service.
Can dust buildup in the extraction system actually be a safety hazard?
Yes, particularly with wood and MDF dust, which can present a combustible dust risk if it accumulates in ductwork or filters that aren’t maintained on schedule. Extraction maintenance is a safety item as much as a housekeeping one.
What should be backed up before a controller update or reset?
Job files, the tool library, machine parameters and any manual offsets or wear compensation the operator has dialed in — the last category is the easiest to lose and the hardest to reconstruct from memory. Keep at least two backup generations.